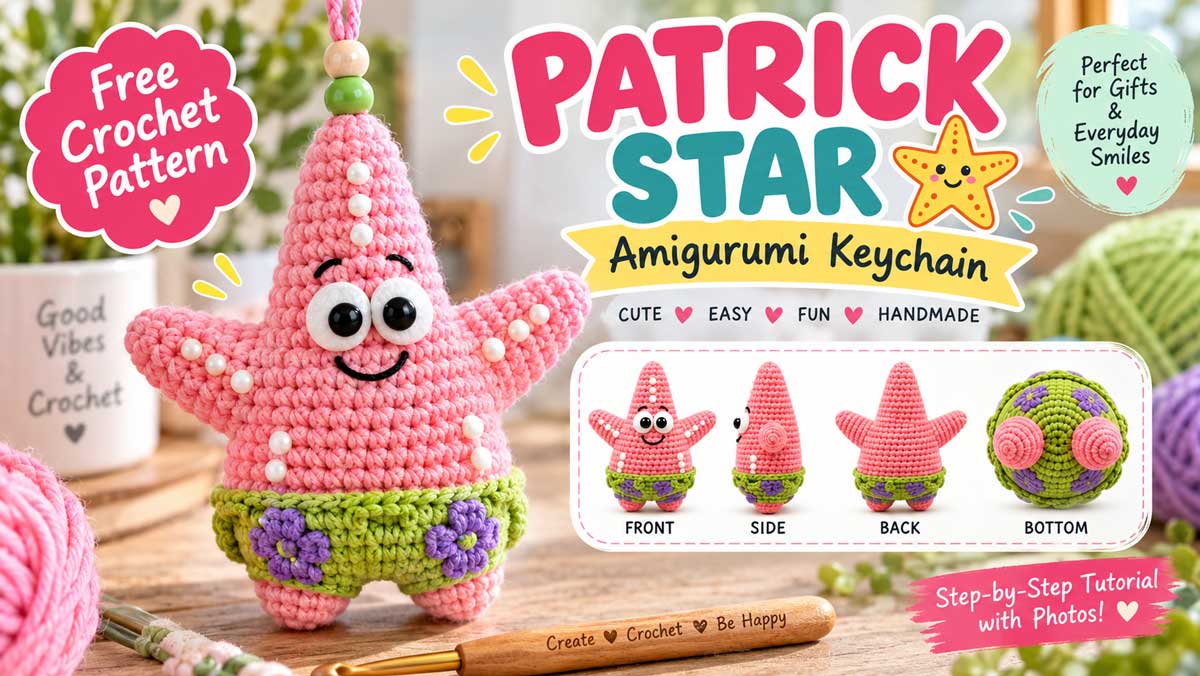
Starfish Crochet Pattern – Easy Free Pattern for Beginners
Creating amigurumi figures and toys is one of the most rewarding and popular hobbies in the fiber arts world. Among the most sought-after designs, the Starfish Crochet Pattern holds a special place for yarn enthusiasts due to its adorable proportions, playful rounded features, and engaging construction technique. It is an exceptional project for honing your skills in seamless joining, color transitions, and detailed assembly.
Whether you are a beginner looking for a fun and manageable project or an experienced crafter wanting to add a charming item to your handmade plushie collection, this complete guide is tailored to walk you through every step. In this tutorial, we will cover all essential materials, round-by-round instructions, precise sizing, screen instructions commonly found in video tutorials, stuffing techniques, and finishing touches to ensure your finished starfish looks clean, professional, and balanced.
Table of Contents
- 1. Essential Materials and Tools
- 2. Crochet Abbreviations & Symbols Reference Table
- 3. Sizing, Gauge, and Technical Notes Before Starting
- 4. Step-by-Step Instructions for the Starfish Crochet Pattern
- 5. Professional Assembly and Finishing Techniques
- 6. Common Mistakes and How to Avoid Them
- 7. Creative Project Ideas and Variations
- 8. Frequently Asked Questions (FAQ)
- 9. Final Thoughts
1. Essential Materials and Tools
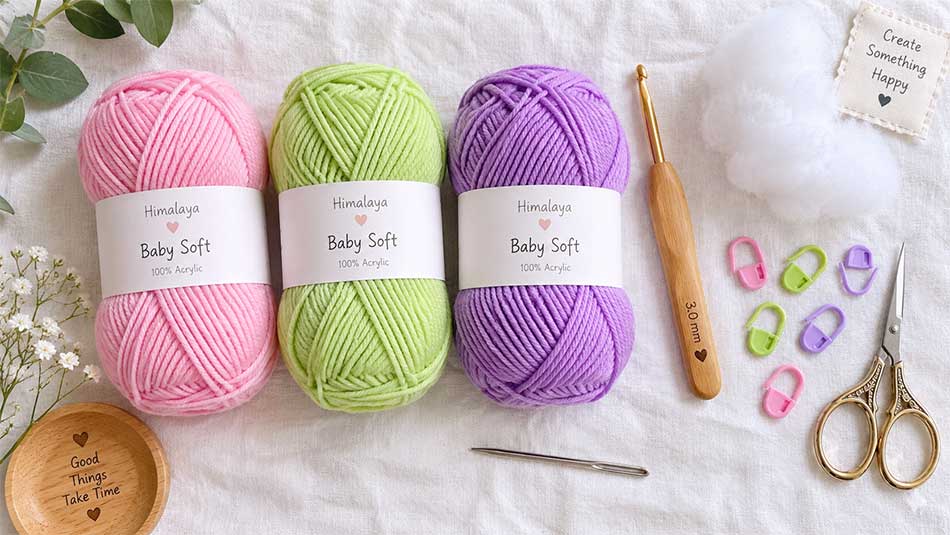
To achieve the best results and create a plush, high-quality figure that matches professional standards, gather the following supplies before starting your Starfish Crochet Pattern project:
- Yarn (5 Ply Milk Cotton or Worsted Weight Cotton Blend):
- Primary Color (Pink or Coral Pink): Main body and limbs (approx. 40–50 grams).
- Secondary Color (Lime Green or Aqua): Shorts / lower waistband (approx. 20–25 grams).
- Accent Color (Purple / Violet): Flower appliques or embroidered motifs (approx. 5 grams).
- Crochet Hook: Size 3.0 mm (or 2.5 mm if you tend to crochet loosely and want tight stitches to prevent stuffing leakage).
- Polyester Fiberfill Stuffing: Premium hypoallergenic stuffing to give your starfish a soft yet firm shape.
- Safety Eyes or Felt Sheet:
- 6 mm to 7 mm safety eyes, or black and white craft felt sheets for custom eye cutouts.
- Stitch Markers: Essential for marking the beginning of continuous spiral rounds.
- Yarn Needle (Tapestry Needle): A blunt-ended needle with a large eye for assembling pieces and embroidering facial details.
- Sharp Scissors: For clean thread cutting.
- Fabric Glue or Liquid Silicone: Optional, for securing felt features or flower appliques.
2. Crochet Abbreviations & Symbols Reference Table
To make reading the pattern instructions effortless, review the standard US crochet terminology used throughout this tutorial:
| Abbreviation | Term | Description & Execution |
|---|---|---|
| MR | Magic Ring | An adjustable loop used to start circular crochet seamlessly without a central hole. |
| ch | Chain | The fundamental foundation stitch used for height or joining gaps. |
| sc | Single Crochet | The primary stitch used in amigurumi crafting. |
| inc | Increase | Work two single crochets (2 sc) into the same stitch to expand the round. |
| dec | Decrease | Combine two adjacent stitches into one (invisible decrease recommended) to narrow work. |
| sl st | Slip Stitch | Used to close rounds, join pieces, or create smooth edge transitions. |
| BLO | Back Loop Only | Crochet into the rear loop of the stitch only, leaving a defined front ridge. |
| FLO | Front Loop Only | Crochet into the front loop of the stitch only. |
| ( ) [ ] | Repeat Brackets | Repeat the instructions within the brackets by the specified number of times. |
3. Sizing, Gauge, and Technical Notes Before Starting
Before jumping into the round-by-round breakdown of the Starfish Crochet Pattern, keep these crucial technical guidelines in mind. Video tutorials often present these points on screen without full verbal explanation:
- Work in Continuous Spirals: Do not join rounds with a slip stitch or chain 1 at the end of each round unless explicitly instructed. Use a stitch marker in the first stitch of every round to keep accurate track of your location.
- Maintain Consistent Tension: Keep your gauge tight and uniform throughout. Loose stitches create gaps where white fiberfill will show through once stuffed.
- Finished Size Expectation: Using 5-ply milk cotton yarn with a 3.0 mm hook yields a completed starfish measuring approximately 18 to 20 cm (7 to 8 inches) tall. You can scale the size up or down by adjusting your yarn weight and hook size proportionally.
- Seamless Color Changing Technique: When transitioning colors (from pink to green or vice versa), complete the final yarn-over pull-through of the last stitch in the old color using the new color.
4. Step-by-Step Instructions for the Starfish Crochet Pattern
Part 1: Making the Legs and Lower Limbs (Make 2)
We begin by crafting the two lower legs individually. Once completed, they will be joined together to form the base of the starfish figure.
Note: Use primary color yarn (Pink / Coral).
- Round 1: Work 6 sc into a Magic Ring (MR). [Total: 6 sts]
- Round 2: Repeat [3 inc, 3 sc]. [Total: 9 sts]
- Round 3: Work 9 sc around evenly without increases. [Total: 9 sts]
- Round 4: 1 sc, 3 inc, 5 sc. [Total: 12 sts]
- Round 5: Work 12 sc around. [Total: 12 sts]
- Round 6: 2 sc, 3 inc, 7 sc. [Total: 15 sts]
- Round 7 – Round 8: Work 15 sc around for 2 rounds. [Total: 15 sts]
Change Color to Lime Green (Shorts / Base Color):
- Round 9: 4 sc, repeat [1 inc, 1 sc] 3 times, 5 sc. [Total: 18 sts]
- Round 10 (In BLO only): Work 18 sc in Back Loops Only to create a defined shorts edge. [Total: 18 sts]
- Round 11: Repeat [2 sc, 1 inc] 6 times. [Total: 24 sts]
- Round 12: Work 24 sc around evenly. [Total: 24 sts]
Important Note for Leg Assembly: Fasten off the first leg with a slip stitch and weave in the end. For the second leg, do not cut the yarn—you will continue directly into Round 13 to join both legs together.
Part 2: Joining the Legs and Building the Main Body
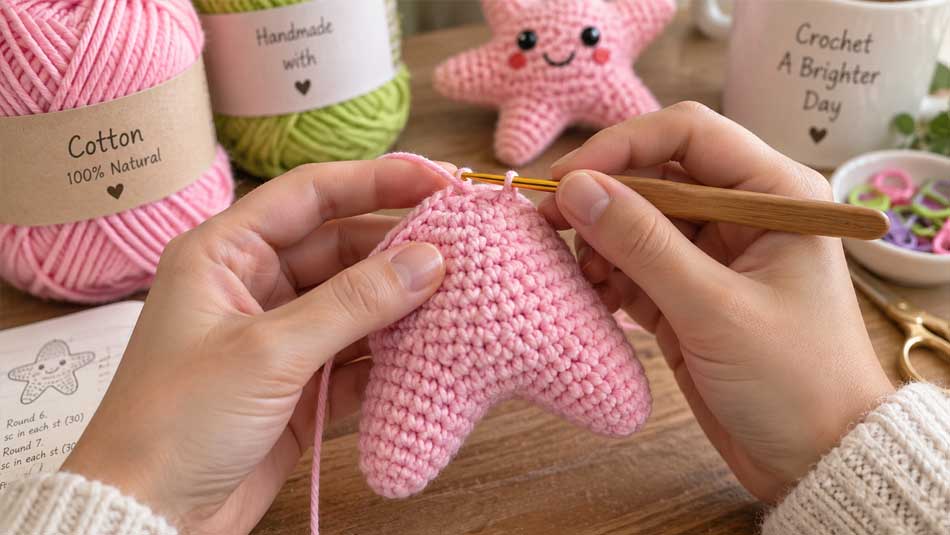
Now we connect both leg components and construct the rounded middle and upper body section of the Starfish Crochet Pattern.
- Round 13 (Joining Round): From the second leg, chain 2 (2 ch), join to the first leg with 1 sc, work 23 sc around the first leg, work 2 sc across the 2-chain bridge, then work 24 sc around the second leg. [Total Count: 52 sts]
- Round 14 – Round 16: Work 52 sc around for 3 consecutive rounds. [Total: 52 sts]
- Round 17: 5 sc, 1 inc, 9 sc, repeat [1 inc, 3 sc] 6 times, 5 sc, 1 inc, 7 sc. [Total: 60 sts]
- Round 18 – Round 21: Work 60 sc around for 4 rounds. [Total: 60 sts]
(Begin stuffing the legs and lower waist firmly with fiberfill as you progress).
Switching Back to Upper Body (Pink / Coral Yarn):
- Round 22: Change to pink yarn, work 60 sc in Back Loops Only (BLO). [Total: 60 sts]
- Round 23 – Round 30: Work 60 sc around for 8 rounds. [Total: 60 sts]
- Round 31 (Waist Decreases): Repeat [8 sc, 1 dec] 6 times. [Total: 54 sts]
- Round 32 – Round 35: Work 54 sc around for 4 rounds. [Total: 54 sts]
- Round 36: Repeat [7 sc, 1 dec] 6 times. [Total: 48 sts]
- Round 37 – Round 40: Work 48 sc around for 4 rounds. [Total: 48 sts]
- Round 41: Repeat [6 sc, 1 dec] 6 times. [Total: 42 sts]
- Round 42 – Round 44: Work 42 sc around for 3 rounds. [Total: 42 sts]
- Round 45: Repeat [5 sc, 1 dec] 6 times. [Total: 36 sts]
- Round 46: Repeat [4 sc, 1 dec] 6 times. [Total: 30 sts]
- Round 47: Repeat [3 sc, 1 dec] 6 times. [Total: 24 sts]
- Round 48 – Round 50: Work 24 sc around for 3 rounds. [Total: 24 sts]
- Round 51 (Top Closure): Work consecutive decreases, leave a long tail, and close the top opening by weaving through the front loops with a tapestry needle.
Part 3: Crocheting the Arms (Make 2)
Create two tapered conical arms in pink yarn to give the starfish its signature silhouette.
- Round 1: Work 6 sc into a Magic Ring (MR). [Total: 6 sts]
- Round 2: Repeat [1 inc, 1 sc] 3 times. [Total: 9 sts]
- Round 3: Repeat [2 sc, 1 inc] 3 times. [Total: 12 sts]
- Round 4: Work 12 sc around. [Total: 12 sts]
- Round 5: Repeat [3 sc, 1 inc] 3 times. [Total: 15 sts]
- Round 6: Work 15 sc around. [Total: 15 sts]
- Round 7: Repeat [4 sc, 1 inc] 3 times. [Total: 18 sts]
- Round 8 – Round 15: Work 18 sc around for 8 consecutive rounds. [Total: 18 sts]
Sl st to finish, cut the yarn leaving a long tail for sewing to the main body later. Stuff the bottom half of the arms lightly so they remain flexible.
Part 4: Facial Details and Decorative Accessories
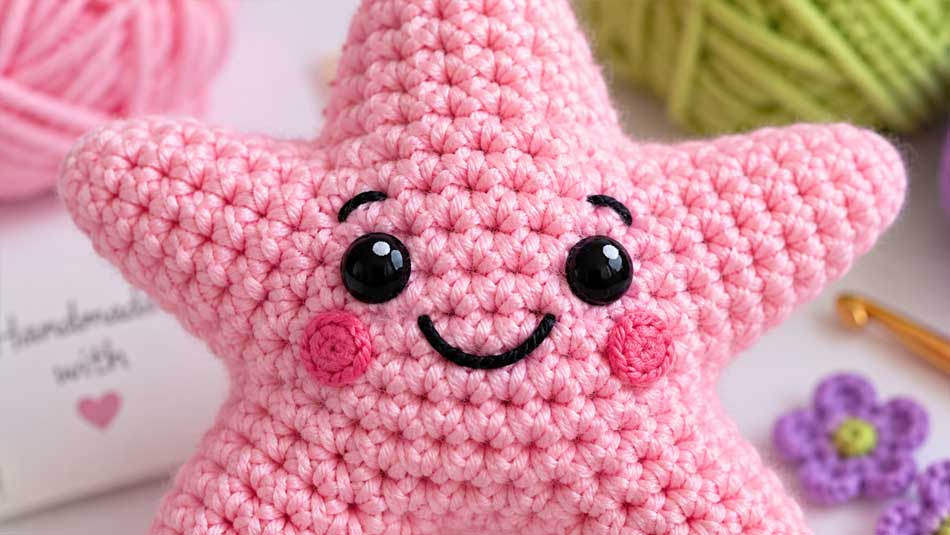
1. Crafting the Eyes
You can choose between two popular methods for adding eyes to your starfish:
- Felt Method:
- Cut two oval shapes from white felt measuring approximately 23 mm in height by 15 mm in width.
- Cut two smaller black ovals measuring roughly 7 mm for the pupils.
- Glue the pupils onto the white ovals with fabric glue, then attach the eyes between Rounds 32 and 35.
- Safety Eyes Method: Insert 6 mm safety eyes between Rounds 33 and 34, leaving 4 stitches between them before closing and stuffing the head.
2. Embroidered Features
- Eyebrows: Using black embroidery floss and a tapestry needle, stitch two small angled lines right above the eyes for an expressive look.
- Mouth: Stitch a simple wide curve in black floss beneath the eye placement.
- Belly Button (Navel): Embroider a small black “X” stitch in the center of the belly just above the shorts line.
3. Purple Flower Appliques for the Shorts (Make 4)
Using purple/violet yarn, craft small floral accents to decorate the shorts base:
- First Petal: Ch 4, work 2 treble crochets (2 tr) into the first chain, ch 3, sl st back into the same foundation chain.
- Second & Third Petals: Repeat [ch 3, 2 tr into base, ch 3, sl st into base].
- Fasten off and sew or glue all four flowers onto the green shorts section symmetrically.
5. Professional Assembly and Finishing Techniques
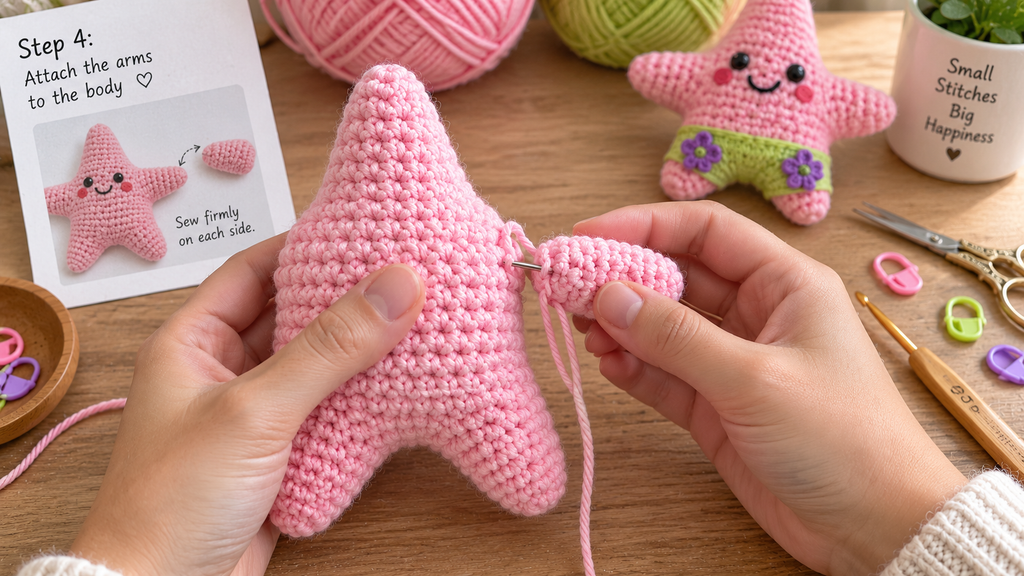
Proper assembly is what gives your Starfish Crochet Pattern project its final polished character. Follow these steps for a clean finish:
- Attaching the Arms:
- Position the arms on either side of the body between Round 32 and Round 33.
- Use sewing pins to hold the arms in place and check for symmetry before stitching.
- Use the yarn tail and a tapestry needle to stitch each arm stitch to the corresponding body stitch securely.
- Finishing the Shorts Cuff Edge:
- Attach green yarn to the remaining front loops (FLO) from Round 10 and work a round of slip stitches (sl st) around to create a neat, raised cuff border.
- Weaving in Loose Ends:
- Thread remaining yarn ends onto your tapestry needle, pass them through the fiberfill core several times, pull slightly, and snip close to the body so the ends disappear inside.
6. Common Mistakes and How to Avoid Them
1. Fiberfill Leakage Between Stitches
Cause: Using a hook that is too large for your yarn thickness or maintaining loose stitch tension.
Fix: Switch to a 2.5 mm or 3.0 mm hook with 5-ply yarn, and pull your working yarn firm after each single crochet.
2. Twisted Seams or Misaligned Increases
Cause: Missing the first stitch of a round or joining continuous spirals with slip stitches unintentionally.
Fix: Always place a stitch marker in the very first stitch of every spiral round and leave it in place until the round is complete.
3. Lumpy or Uneven Stuffing
Cause: Inserting large wads of polyester fiberfill all at once near the end of the project.
Fix: Stuff gradually in small, shredded handfuls as you work through the rounds, pushing filling outward toward the walls and limbs.
7. Creative Project Ideas and Variations
The versatility of the Starfish Crochet Pattern makes it suitable for many fun variations beyond a standard tabletop display:
- Cute Starfish Keychain: Halve the round counts, use 3-ply fine yarn, and use a 1.75 mm hook to make a tiny, lightweight bag charm.
- Jumbo Plush Pillow: Substitute standard cotton yarn with chunky chenille / velvet yarn and a 6.0 mm hook to turn this pattern into a massive, squishy nursery pillow.
- Beach Party Favors: Make a set in pastel tropical colors to serve as gifts or party favors for summer-themed events.
8. Frequently Asked Questions (FAQ)
Q1: How long does it take to complete this starfish crochet project?
A: On average, an intermediate crocheter can complete this project in approximately 3 to 5 hours. It makes a perfect weekend craft project.
Q2: Is this Starfish Crochet Pattern suitable for complete beginners?
A: Yes! The pattern relies primarily on fundamental stitches like single crochet (sc), increases (inc), and decreases (dec). Anyone familiar with basic amigurumi techniques can follow along easily.
Q3: What is the best yarn type for amigurumi plushies?
A: A cotton-acrylic blend (such as Milk Cotton or YarnArt Jeans) is ideal because it does not fray easily, holds structural shape well, and withstands gentle handling.
Q4: How should I clean my finished crochet starfish?
A: Hand-wash gently in cold water using mild baby shampoo. Air dry flat on a towel away from direct sunlight to preserve colors and shape.
9. Final Thoughts
The Starfish Crochet Pattern is a delight to craft, combining easy-to-follow amigurumi principles with cute, personality-filled details. By following the precise round-by-round instructions and assembly guidelines in this post, you now have everything required to bring your own adorable starfish to life.
Happy crocheting! Be sure to share photos of your completed creations on social media and share this guide with fellow craft enthusiasts.