Free Crochet Fox Keychain Pattern (Amigurumi)
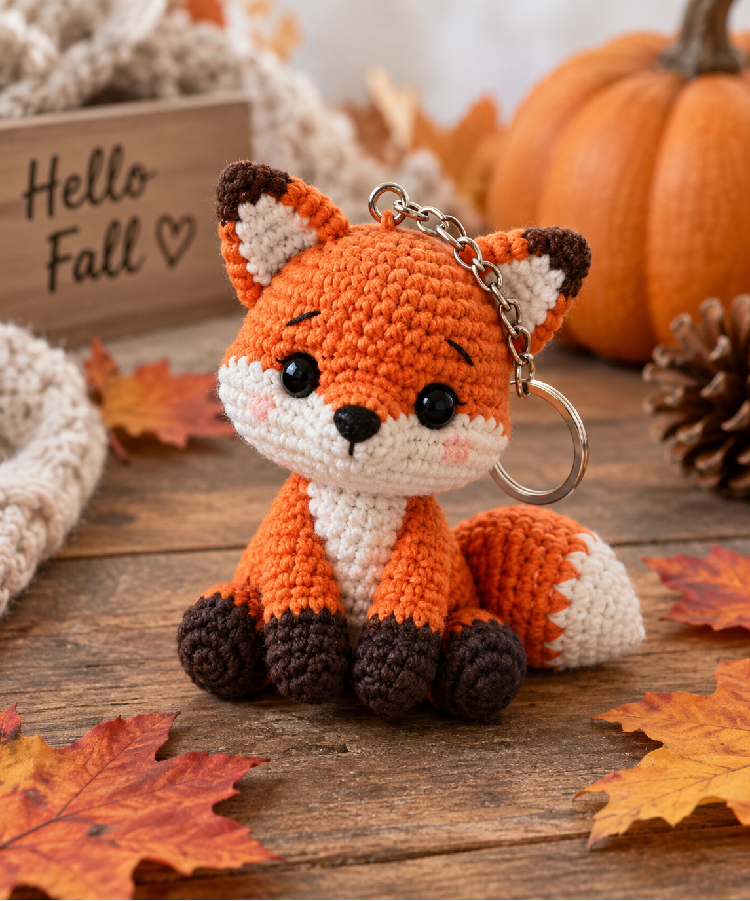
There’s something about autumn that makes us reach for warm colors, cozy textures, and small handmade projects we can carry around with us — and this free crochet fox pattern checks every one of those boxes. This little amigurumi fox is compact enough to finish in an afternoon, uses only basic stitches, and turns into the cutest keychain, bag charm, or desk buddy you’ve ever made. If you’ve been typing “easy crochet fox pattern” or “amigurumi keychain for beginners” into Pinterest search, you’ve landed exactly where you need to be.
This guide isn’t just a list of stitches thrown together — it’s written the way a friend who crochets would actually explain it to you, round by round, with every technique broken down so nothing feels confusing. Whether this is your first amigurumi ever or your fiftieth, you’ll be able to follow along without getting lost.
Why This Crochet Fox Pattern Is Perfect for Beginners
Amigurumi — the Japanese art of crocheting small stuffed creatures — has exploded in popularity over the last few years, and foxes are consistently one of the most requested designs. There’s a good reason for that: foxes have a naturally simple color palette (orange, white, and a touch of brown or black), which means you don’t need dozens of yarn colors to get a recognizable, adorable result. Unlike more complex animal patterns that require shaping multiple limbs, snouts, or wings, this fox is built almost entirely from simple spheres and cones, making it one of the most forgiving amigurumi projects you can start with.
Here’s what makes this particular pattern beginner-friendly:
- It only uses single crochet, increases, and decreases — no advanced stitches required
- The pieces are small, so mistakes are quick to notice and quick to fix
- It’s an excellent scrap-yarn project if you already have leftover worsted-weight yarn at home
- The finished size is perfect for a keychain, so there’s no long-term commitment if you’re just testing out amigurumi for the first time
- It teaches you core amigurumi skills — magic ring, color changes, invisible decreases — that you’ll reuse in almost every future pattern
Choosing the Right Yarn and Hook
One of the most common questions beginners ask is which yarn and hook size actually work best for amigurumi, since it’s noticeably different from garment crochet. For amigurumi, the goal is a tight, dense fabric so that the stuffing doesn’t peek through the stitches. That means you’ll want to size down your hook from what’s recommended on the yarn label — if your yarn suggests a 4mm hook, try a 2.5mm–3mm hook instead.
For this fox, a worsted weight (medium, 4-ply) acrylic or cotton-acrylic blend yarn works beautifully. Acrylic yarn is a popular choice for amigurumi sellers because it’s affordable, holds its shape well, and comes in a huge range of colors — perfect for the fox’s signature orange, white, and brown palette. If you prefer a more matte, natural look, a cotton yarn works too, though it can be slightly less forgiving for beginners since it has less stretch.
Materials You’ll Need
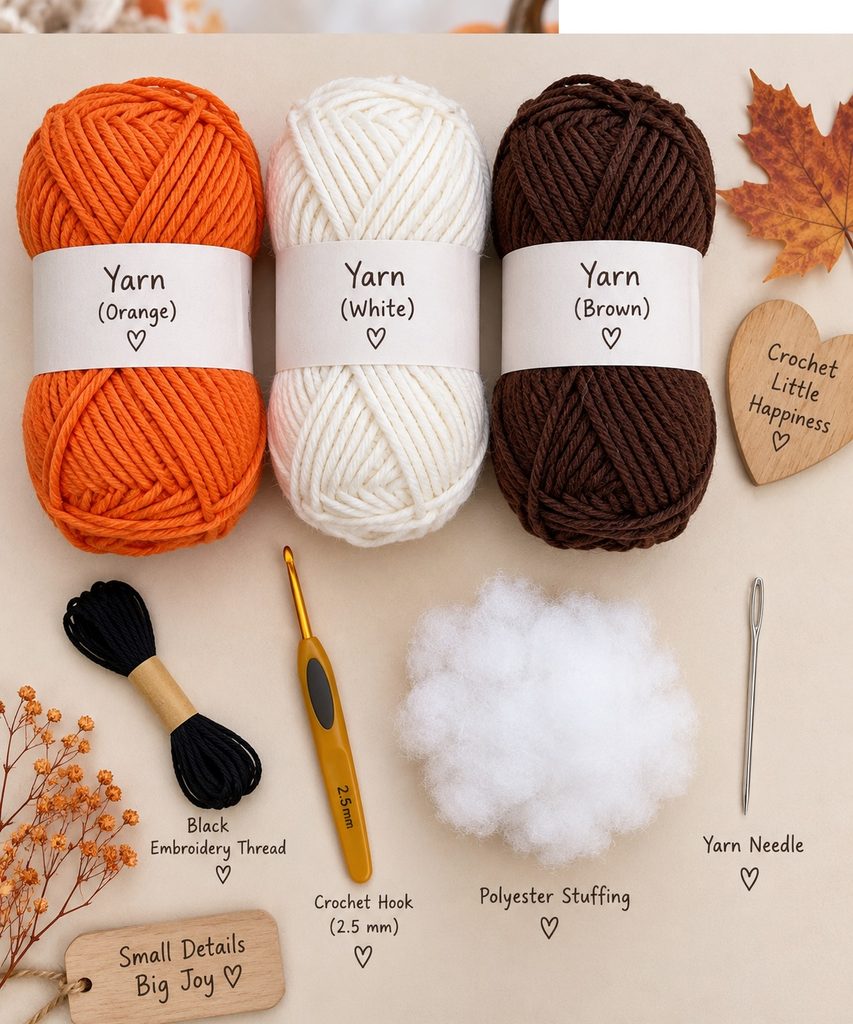
| Item | Details |
|---|---|
| Yarn | Worsted weight yarn in orange, white, and brown (small amount of black embroidery thread for the face) |
| Crochet Hook | 2.5mm–3mm (size down from the label recommendation for a tight, stuffing-proof fabric) |
| Stuffing | Polyester fiberfill |
| Stitch Markers | 1–2, to mark the start of each round |
| Yarn Needle | For sewing pieces together and weaving in ends |
| Embroidery Needle | For stitching the eyes and nose |
| Optional | Keychain ring or clasp, safety eyes instead of embroidery, small scissors |
Crochet Abbreviations Used in This Pattern
| Abbreviation | Meaning |
|---|---|
| ch | chain |
| sc | single crochet |
| inc | increase (2 sc in the same stitch) |
| dec | invisible decrease (worked through front loops only) |
| st(s) | stitch(es) |
| sl st | slip stitch |
| ( ) | total stitch count at the end of the round |
| *…* | repeat the instructions between asterisks for the stated number of times |
Quick Refresher: Techniques You’ll Use
If you’re newer to amigurumi, a few techniques in this pattern are worth understanding before you dive in, since they show up repeatedly throughout the pattern.
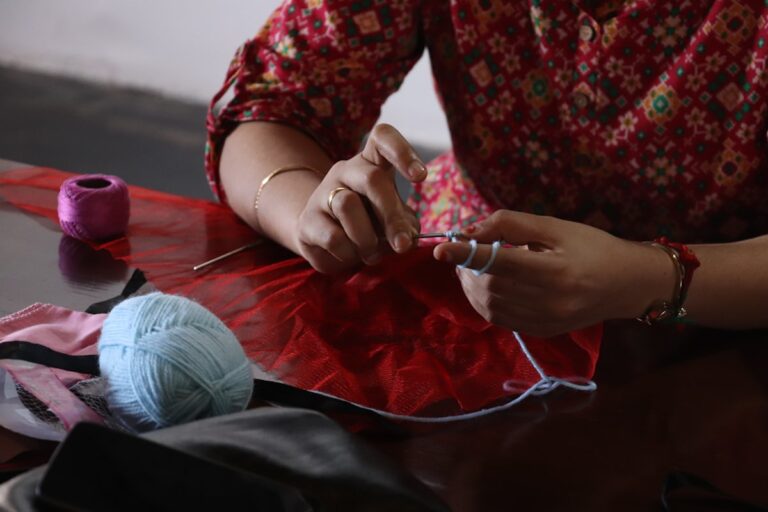
The magic ring is how almost every amigurumi piece begins. Instead of chaining and joining (which leaves a small hole at the center), the magic ring lets you crochet your first round of stitches into an adjustable loop, then pull it tight afterward for a completely closed center. It looks intimidating the first time, but after two or three tries it becomes second nature.
Working in a continuous spiral means you don’t slip stitch to join each round the way you would in traditional crochet — you simply keep going round after round, using a stitch marker to track where each new round begins. This is what gives amigurumi its smooth, seamless surface.
The invisible decrease is what separates neat amigurumi from lumpy amigurumi. Instead of a standard decrease (which can leave a small gap or bump), the invisible decrease is worked through the front loops only of two stitches, pulled together, then completed as normal. It takes a little more time but gives a noticeably smoother shaping, especially around the head and face.
Color changes happen when you’re on the last pull-through of a stitch — instead of finishing with your current color, you switch to the new color for that final pull, which carries it seamlessly into the next round.
Before You Start: Quick Tips
- Keep your tension slightly tight so stuffing doesn’t peek through the stitches.
- Use a stitch marker at the start of every round — amigurumi is worked in a continuous spiral, not joined rounds.
- Carry your color-change yarn tails along the next few stitches instead of cutting immediately — it saves a lot of time weaving in ends later.
- Stuff firmly but not overly tight, especially right before closing each piece.
- Count your stitches at the end of every round. If your count is off, it’s much easier to fix immediately than three rounds later.
Part 1: Crocheting the Head and Hat
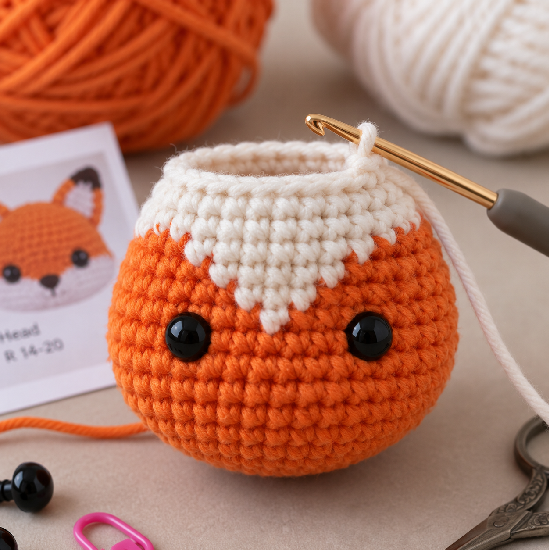
The fox’s head is worked first, topped with a two-tone “hat” effect created by switching from orange to white yarn partway through — this is what gives the fox its signature look.
- Round 1: 7 sc in a magic ring (7)
- Round 2: inc in each st around (14)
- Round 3: *sc, inc* repeat around (21)
- Round 4: *sc, inc, sc* repeat around (28)
- Round 5: *3 sc, inc* repeat around (35)
- Rounds 6–10: sc in each st around (35) — 5 rounds total
- Round 11: *2 sc, inc, 2 sc* repeat around (42) — switch to white yarn on the last stitch
- Round 12: sc in each st around using white yarn, carrying the orange tail (42)
- Rounds 13–15: sc in each st around (42) — 3 rounds total
- Round 16: *sc, dec* repeat around (28)
- Round 17: *2 sc, dec* repeat around (21)
- Begin stuffing the head firmly at this point.
- Round 18: *sc, dec* repeat around (14) — switch back to orange yarn
Part 2: Crocheting the Body
Continue directly from the head, or work the body separately and sew it on afterward.
- Round 1: inc in each st around (28)
- Round 2: *3 sc, inc* repeat around (35)
- Rounds 3–6: sc in each st around (35) — 4 rounds total
- Round 7 (Feet Row): 16 sc, then switch to brown yarn and work a bobble stitch (5 double crochets pulled together) to form a foot, 2 sc in orange, work a second bobble stitch in brown for the second foot, then sc around the rest in orange (35)
- Round 8: sc in each st around (35)
- Round 9: *3 sc, dec* repeat around (28)
- Round 10: *dec* repeat around (14)
- Stuff the body firmly.
- Round 11: dec around (7), fasten off leaving a long tail, and close the opening using the invisible closing method with a yarn needle.
Part 3: Embroidering the Face
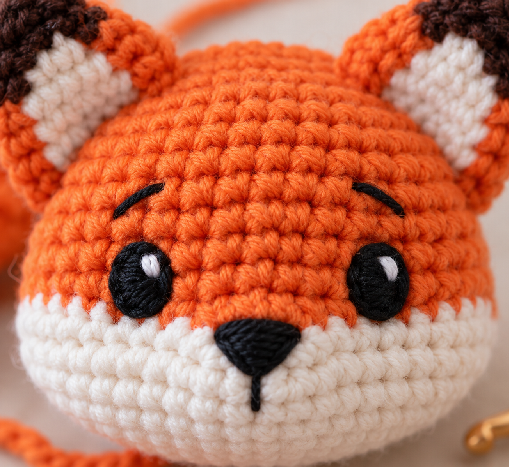
Using 3 strands of black embroidery thread, stitch the eyes onto round 12 of the head, spacing them about 8 stitches apart. Use 2 strands for the small nose and optional eyelash details, centered between the eyes. If you’d rather skip embroidery, plastic safety eyes are a great substitute — just insert them before you finish stuffing the head.
Part 4: Crocheting the Ears (Make 2)
- Round 1 (brown yarn): 6 sc in a magic ring (6)
- Round 2: inc around (12), switch to orange on the last stitch
- Round 3 (orange yarn): sc around (12)
- Round 4: *3 sc, inc* repeat around (15)
- Fold the ear flat and single crochet through both layers together to close, leaving a long tail for sewing.
Sew the ears onto the head between rounds 4–8, angled slightly outward for a natural, alert fox expression.
Part 5: Crocheting the Tail
- Round 1 (brown yarn): 5 sc in a magic ring (5)
- Round 2: inc around (10)
- Round 3: sc around (10)
- Round 4: *sc, inc* repeat around (15) — switch to orange yarn
- Round 5: sc around (15)
- Round 6: *2 sc, inc* repeat around (20)
- Round 7: sc around (20)
- Round 8: *2 sc, dec* repeat around (15)
- Rounds 9–10: sc around (15)
- Round 11: *sc, dec* repeat around (10)
- Lightly stuff the tail.
- Rounds 12–14: sc around (10)
- Flatten the tail and single crochet the opening closed.
Sew the tail onto the body in either an upright or hanging position — both look adorable, so this is entirely a matter of personal preference.
Part 6: Crocheting the Scarf
For a beginner-friendly finish, chain to your desired scarf length, then work 1 sc into each chain across, fasten off, and weave in the ends. Wrap it snugly around the fox’s neck and secure with a few small stitches. If you’re feeling more adventurous, a simple garter-style crochet scarf (worked into the back bumps of the chain and then into the “v” of each stitch) gives a slightly more knitted, textured look — it’s trickier for beginners, but it’s a lovely detail if you want to push your skills a bit further.
Common Mistakes to Avoid
- Losing track of your round: Always use a stitch marker — amigurumi rounds spiral continuously, so it’s easy to lose your place, especially past round 10.
- Stuffing too loosely: This causes a lumpy, uneven shape once the piece is closed. Stuff firmly, especially in the head and body, and check for evenness by gently squeezing the piece.
- Skipping the invisible decrease: A regular decrease can leave visible gaps or a slightly bumpy texture. The front-loop-only method gives a much smoother, more professional finish.
- Not carrying yarn tails: Carrying tails along the next few stitches instead of cutting them immediately saves a huge amount of time weaving in ends at the very end.
- Using a hook that’s too large: This is the single biggest cause of “gappy” amigurumi where the stuffing shows through. When in doubt, size down.
- Rushing the closing stitch: A sloppy closure at the bottom of the body or ears is one of the most noticeable finishing mistakes. Take an extra minute to make sure it’s pulled tight and secure.
Customizing Your Crochet Fox
One of the best things about this pattern is how easily it adapts. Once you’ve made one fox, you’ll find dozens of ways to make the next one your own:
- Change the size: Use a bulkier yarn and larger hook for a bigger, huggable version, or a fine crochet thread and steel hook for a miniature charm.
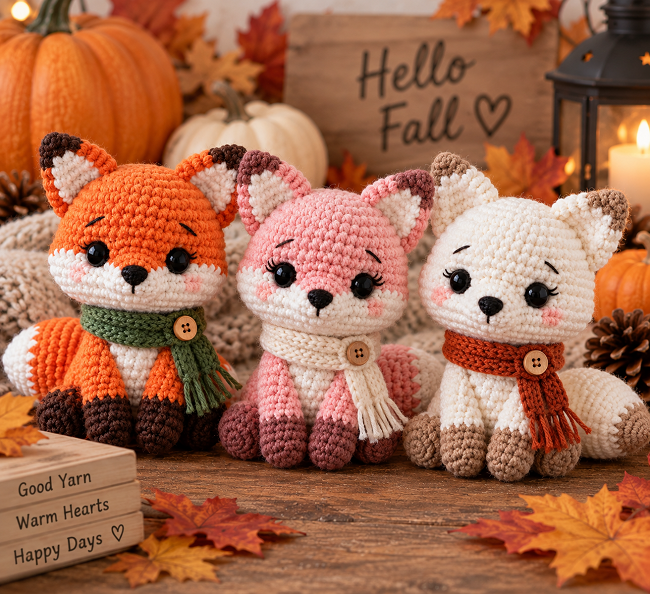
- Change the color palette: A white and grey Arctic fox, a pink and cream “fantasy fox,” or even a color-matched fox for a specific holiday all work beautifully with this same base pattern.
- Add personality: A tiny bow, a knitted sweater instead of a scarf, or a set of small flowers behind one ear can turn a basic fox into a signature design that’s uniquely yours.
- Turn it into different accessories: Add a keyring for a keychain, a lobster clasp for a bag charm, a brooch pin for a wearable accessory, or simply leave it as a shelf decoration.
Gift Ideas and Styling
This little fox makes an especially charming handmade gift heading into fall and the holiday season. A few ideas that work well if you’re planning to sell or gift your finished foxes:
- Attach it to a wrapped gift as a decorative topper instead of a traditional bow
- Package it with a small tag describing the “story” of your fox — handmade items with a bit of personality tend to feel more special
- Photograph it against a warm, textured background (wood, knit blankets, autumn leaves) for a cozy product photo that performs well on Pinterest
- Offer a matching set — fox, plus a mini pumpkin or acorn — for a bundled gift or shop listing
Caring for Your Finished Amigurumi
Handmade amigurumi pieces are fairly low-maintenance, but a little care keeps them looking their best. Spot clean with a damp cloth and mild soap rather than machine washing, since agitation can felt the yarn fibers and distort the shape. Keep finished pieces out of direct sunlight for long periods, as this can cause colors to fade over time. If a piece gets slightly out of shape, reshaping it gently by hand while it’s still slightly damp usually helps it settle back into place.
Frequently Asked Questions
What size hook should I use for amigurumi?
A smaller hook than usual is recommended for amigurumi — typically one size down from what’s suggested on your yarn label. This keeps stitches tight so stuffing doesn’t show through the fabric.
Can I make this fox bigger or smaller?
Yes — simply use a bulkier or finer yarn along with a matching hook size. The stitch counts stay exactly the same; only the finished size changes.
How long does this pattern take to make?
Most beginners finish this fox keychain in about 2–4 hours total, though it’s easy to split the work across a few short sessions since each piece (head, body, ears, tail) can be completed separately.
What yarn weight works best for a keychain-sized fox?
Worsted weight (medium, 4-ply) yarn with a 2.5mm–3mm hook gives you the keychain size shown in this pattern. Sizing down to a sport or fingering weight yarn will give you an even smaller, more delicate charm.
Do I have to embroider the face, or can I use safety eyes?
Either works well. Embroidered eyes give a softer, more whimsical look and are safer for very young children since there are no small plastic parts. Safety eyes are faster to attach and give a slightly more polished, “toy store” appearance.
My amigurumi looks lumpy — what went wrong?
This is almost always caused by one of two things: stuffing unevenly (leaving gaps in some areas and clumps in others) or using a hook that’s slightly too large for your yarn. Try sizing down your hook and stuffing in small pinches rather than large handfuls for a smoother result next time.
Final Thoughts
This crochet fox keychain is one of those projects that looks far more complicated than it actually is. Once you get through the color changes and the bobble-stitch feet, the rest comes together quickly, and you’re left with a genuinely adorable little companion that’s perfect for fall. It makes a lovely handmade gift, a fun seasonal accessory, or simply a satisfying weekend project if you’re new to amigurumi and want to build confidence with the core techniques.
If you make your own version, we’d love to see it! Save this pattern to Pinterest so you can find it again later, and check out more free amigurumi patterns on the blog for your next project.