Easy Crochet Amigurumi Bunny: A Beginner-Friendly Guide
Amigurumi is the art of crocheting small stuffed figures, and it is one of the most charming areas of crochet. A tiny bunny can become a desk companion, nursery decoration, handmade gift, or part of a collection of miniature animals. Although amigurumi may look complicated in photographs, many designs are built from simple single crochet stitches worked in continuous rounds.
This beginner-friendly guide explains the construction of a small bunny and the techniques behind it. Rather than overwhelming you with a complicated pattern, we will focus on how the head, body, ears, arms, and feet are shaped, how stuffing affects the finished form, and how to make your stitches neat and consistent.

What Makes Amigurumi Different?
Traditional flat crochet often uses turning rows, while amigurumi commonly uses small continuous rounds. Single crochet creates a dense fabric that helps keep stuffing inside the toy. Increases make the shape wider, while decreases bring the shape back inward.
Understanding this simple geometry is more valuable than memorizing one pattern. Once you know how increases and decreases change a sphere, cylinder, or oval, you can begin designing your own creatures.
Materials
- Smooth worsted or DK weight yarn.
- A crochet hook slightly smaller than you might use for a loose fabric.
- Polyester fiberfill or another appropriate stuffing material.
- Yarn needle and scissors.
- A stitch marker.
- Safety eyes only when appropriate for the intended recipient and age group.
For toys intended for babies or very young children, embroidered facial features are generally a safer choice than detachable plastic pieces. Always follow the safety guidance supplied with your materials and pattern.
Choosing the Yarn
Smooth cotton or acrylic yarn is easy to work with because individual stitches are visible. Avoid highly fuzzy yarn for your first amigurumi because it can hide stitch placement. Light colors are often easier for beginners because you can see the loops clearly.
Choose a yarn that feels comfortable in your hands. Since amigurumi requires firm tension, an uncomfortable yarn can make a long project tiring.
Make the Head
Most amigurumi bunny heads begin as a small circle. Start with a magic ring or a short chain joined into a ring. Work single crochet stitches into the center and increase evenly over several rounds. The shape will gradually expand.
After reaching the widest point, stop increasing and work several even rounds. The fabric will begin to curve into a rounded form. This is where the project starts to look like a head rather than a flat circle.
Shape the Face
As you move toward the lower half of the head, begin decreasing. Spread the decreases evenly rather than placing them all in one area. The goal is to create a smooth rounded shape without sharp corners.
Insert the eyes before completely closing the head if you are using safety eyes. Follow the manufacturer’s instructions and consider the age of the intended recipient. For a baby-safe version, embroider the eyes with yarn instead.
Stuffing Correctly
Stuffing changes the character of an amigurumi. Too little stuffing creates a soft, collapsed shape, while too much can stretch the stitches and make gaps visible. Add small amounts gradually, pushing the stuffing into the curves with a blunt tool if necessary.
Do not wait until the final opening to add all the stuffing. Add it while the shape is still accessible, then continue crocheting. Rotate the toy as you work so the stuffing remains evenly distributed.
Make the Body
The body uses the same basic idea as the head. Begin with a small circle, increase to the desired width, work several rounds without increases, then decrease toward the bottom. A slightly oval body gives a classic bunny silhouette.
You can make the body longer for a sitting rabbit or shorter for a compact pocket-sized toy. The beauty of handmade amigurumi is that small changes create completely different personalities.
Shape the Ears
Bunny ears can be crocheted as narrow tubes or flat oval pieces joined around the edges. For a simple three-dimensional ear, begin with a small foundation and work rounds that gradually create a tapered shape.
Do not overstuff the ears. A little stuffing can give them shape, but many bunny designs look better when the ears remain flexible. Sew them securely to the head after positioning them symmetrically.
Make Arms and Feet
Small limbs are usually created as narrow tubes. Start with a few stitches, work several rounds, add a small amount of stuffing, and close the opening. The exact proportions are up to you. Longer arms can create a playful look, while larger feet help a sitting bunny balance visually.
Before sewing the limbs permanently, use removable markers or pins to test the placement. Look at the bunny from the front, side, and back so you can adjust the position before committing.
Simple Facial Details
A tiny embroidered nose and mouth can transform the expression. Use a yarn needle and a contrasting yarn color. Make several small passes rather than pulling one long strand across the face. This gives you better control and makes the details easier to adjust.
You can also add embroidered eyelashes, cheeks, or a small forehead detail. Keep decorative pieces securely attached and consider safety first when the toy is intended for children.
Joining the Pieces
Use a yarn needle to sew the pieces together. Insert the needle through several stitches on both the limb and body rather than attaching through only one loop. Pull firmly enough to hold the piece in place without distorting the fabric.
Take your time with placement. Symmetry is easier to achieve when you attach the arms and ears in stages instead of sewing everything immediately.
How to Avoid Visible Holes
Amigurumi needs firm tension because large spaces between stitches allow stuffing to show. If you can easily see the stuffing through your fabric, try a smaller hook. However, do not make the tension so tight that you cannot comfortably insert the hook.
Pay attention to invisible or nearly invisible decreases if your pattern recommends them. They create a smoother surface and reduce obvious gaps.
Color Ideas
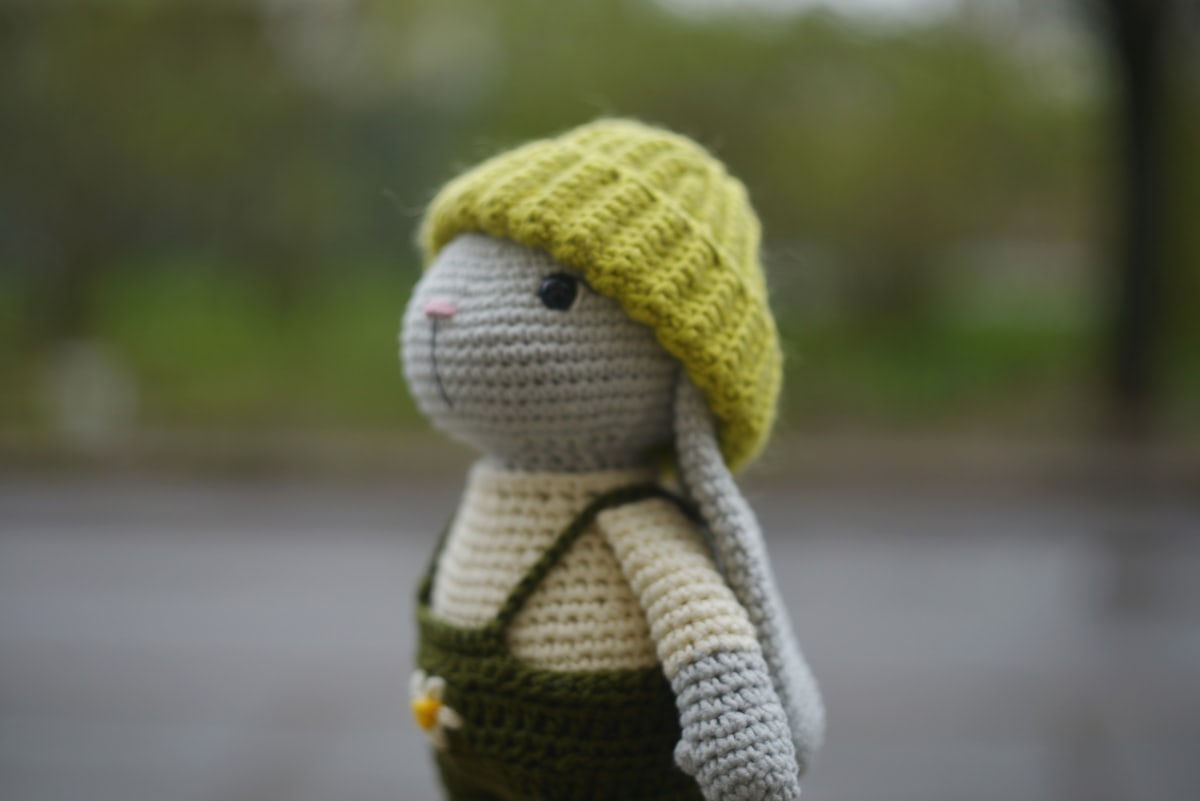
A classic bunny can be white, cream, gray, tan, pink, or brown. For a modern look, try sage green, dusty blue, lavender, or terracotta. A contrasting inner ear gives the toy extra character without making the construction complicated.
If you are creating a collection, use the same body pattern but vary the colors and ear shapes. You can turn one basic design into an entire family of handmade animals.
Common Beginner Problems
If your rounds are becoming difficult to count, use a stitch marker at the beginning of every round. If the toy is twisting, check that you are working consistently in the same direction. If the shape looks lumpy, check the distribution of your increases and decreases.
Do not worry if your first bunny is not perfectly symmetrical. Hand embroidery, stuffing, and sewing all influence the final result. Your second toy will usually feel much easier because your hands understand the construction.
Care and Storage
Follow the care instructions for the yarn. If the finished toy can be washed, use gentle methods and allow it to dry completely. Store handmade amigurumi away from excessive heat and moisture. If it becomes flattened, gently reshape it by hand.
Final Thoughts
Amigurumi is a wonderful way to turn simple crochet stitches into expressive three-dimensional objects. Start with a small bunny and concentrate on even single crochet, consistent increases and decreases, balanced stuffing, and secure sewing.
Once you understand the basic shapes, experiment. Change the ears, body proportions, colors, facial expression, or accessories. The same techniques can lead to bears, cats, dogs, birds, mushrooms, fruits, and countless other creations. Crochet becomes especially rewarding when you stop seeing a pattern as a fixed object and begin seeing it as a set of building blocks.
Plan Your Next Amigurumi
After finishing a first bunny, keep the pattern nearby and think about which part you enjoyed most. If you liked shaping the head, try another rounded character. If you enjoyed sewing the pieces together, experiment with different ear and limb placements. If color was the most exciting part, create several versions using the same construction in different palettes.
A simple way to design a new character is to begin with familiar shapes. A round head can become a bear, cat, chick, or mouse by changing the ears and facial details. A longer body can become a standing animal, while a wider body can create a sitting figure. You do not need to invent every stitch from nothing. Small changes to proven shapes can produce a completely original result.
Keep a notebook for your experiments. Record the yarn, hook size, number of stitches in each round, and where you placed increases and decreases. If a shape works particularly well, you can recreate it later. Notes are especially useful when you want two toys to have matching proportions.
Photograph your progress before closing each major section. Pictures make it easier to remember where facial features were positioned or how far apart the ears were sewn. They can also show how stuffing changed the shape, which is valuable information for your next project.
As your skills improve, explore color changes, surface embroidery, simple accessories, and different body proportions. Keep each new experiment focused on one main idea so you can understand what changed the result.
A Gentle Reminder About Handmade Toys
Handmade toys are special because they carry the maker’s time and attention. When creating an amigurumi as a gift, think about the recipient’s age and intended use. Use secure construction, appropriate materials, and embroidered details when a younger child may handle the toy. A beautiful finished piece should also be practical and safe for the person receiving it.